Annuals are usually seen as throw-away plants. They are the plants that will be killed by the first freeze in the fall and replaced with a new batch in the spring.
The advantage of annuals, as opposed to perennials that will survive the winter and return the following spring, is that their blossoms last longer, some of them from the time they are transplanted into the garden around Memorial Day until the first frost. Perennials bloom for much less time.
People use annuals in lots of ways. They plant them in containers around the house or in cemeteries at the gravesides of relatives. They use them to line walkways where people want a lot of color. Homeowners often use annuals to fill in landscapes while they are giving new trees, shrubs and perennials space to expand.
Annuals are relatively inexpensive and can be purchased in small containers or, from some garden centers, as six-packs of plugs (tiny seedlings) each spring.
Some annuals, however, are worth the effort of digging them up each fall and saving, to transplant back into the garden the following spring.
A few weeks ago my wife, Nancy, who I freely admit is a much better flower gardener and weeder than I am, was trimming damaged leaves from a variegated geranium. (A side note here. The botanical name for the plant is Pelargonium. There is a native perennial with the botanical name Geranium, often called cranesbill. If I could find the person who started calling Pelargoniums Geraniums, I would spend a long time thinking up a severe but nonviolent punishment.) The cultivar was ‘Frank Headley,’ which has green leaves with a broad, white band around their edges. It produces many salmon-pink flowers that stand several inches above the foliage, and is a beautifully showy plant.
Nancy bought it by mail order a few years ago from Avant Gardens, a specialty nursery in Dartmouth, Massachusetts, where she buys a few plants each spring.
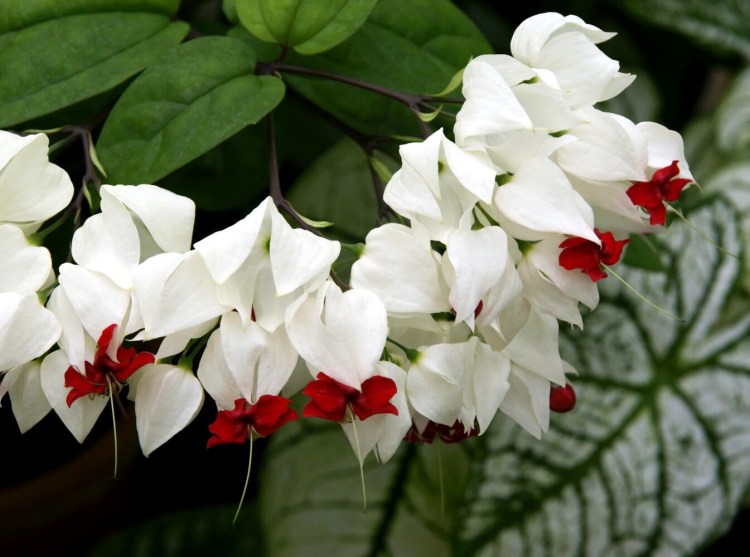
Another annual Nancy will be keeping over this winter is Clerodendrum Thomsoniae, a white bleeding heart with red stamens.
A friend of ours has a coleus with unusual shape and coloring that was a favorite of her late father, and she saves that over every winter.
Home gardeners aren’t going to save every annual in the garden. It would be a lot of work and take up too much window space in the house.
But ‘Frank Headley’ can be hard to find, the bleeding heart bloomed later than we would have liked, and both are relatively expensive. And that specific coleus is hard to find and has sentimental value.
So, after you’ve decided which annuals to save, how do you save them?
Dig them out carefully, before the first frost. You can prune them by about a third if you want, but it isn’t absolutely necessary. Then carefully remove most of the garden soil that is around the roots. You don’t want to bring worms or other soil pests indoors with the plant.
Plant them in a clean pot using a sterile potting mix. We use Pro-Mix, which we buy in a 3.8 cubic foot container that weighs 60 pounds. Yes, it comes in a plastic bag, contrary to my column last week, but the bag lasts us several years and, being huge, is less plastic per pound of product than it would be if we bought smaller bags. Also, sterilizing compost and/or garden soil yourself, which involves baking soil in your oven, uses a lot of energy, plus it makes the house smell for quite a while.
You can put more than one plant in a pot. The purpose of bringing them inside for the winter is to keep them alive. Actual growth is not necessary.
Once they are planted, bring the plants indoors and wash the leaves, searching for tiny insects. You don’t want the bugs inside, where they could spread to your houseplants. It helps to keep all the plants from outdoors in the same room.
Another method of saving annuals is to take cuttings. Fall is not the best time to do this, however. By then the foliage is tired. Mid-spring or shortly after you have put the annuals outside in spring is the better time.
Take 3- to 5-inch cuttings from the plant, remove leaves from the bottom half, and insert the cuttings into moist potting soil. A rooting compound is available commercially to assist in the process, but it is not necessary. Most websites advise covering the pot in (sorry) clear plastic, supporting it above the cutting, but Nancy skips the plastic and simply keeps the plant warm. In about a month, the plant should be rooted. It’s time to remove the plastic (if used) and move the plant to direct sun.
All the plants, whether transplanted or grown from cuttings, should be kept moist but not soggy until they can go outside again.
This is all another bit of entertainment for what appears could be another several months of social distancing and staying at home.
Tom Atwell is a freelance writer gardening in Cape Elizabeth. He can be contacted at: tomatwell@me.com
Send questions/comments to the editors.


