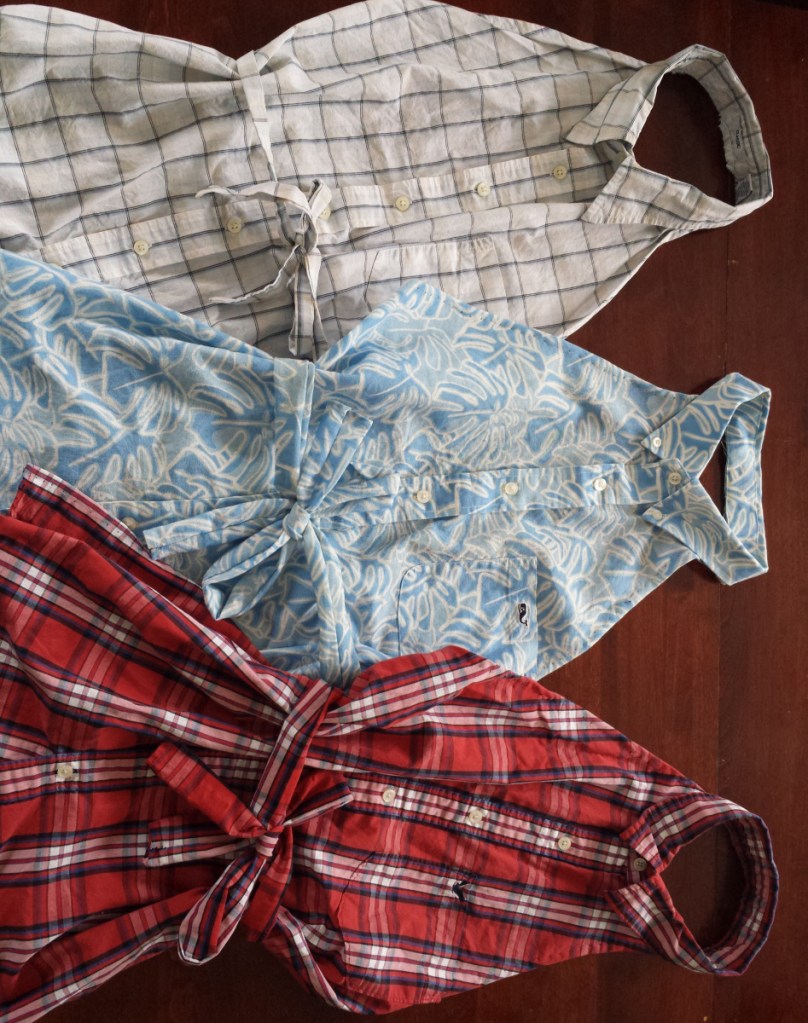
I have upcycled food scraps in my kitchen to avoid waste for many years. I regularly turn lobster shells and corn cobs into broth, citrus rinds into both sugary garnishes and household cleaners, root vegetable peels into finishing salts, and canned bean juice into marshmallow-like ghosts.
It’s only recently that I’ve started upcycling inedible objects for use in the kitchen. This Valentine’s Day, instead of cards, chocolates and flowers, I’m presenting almost everyone I love – the exception is my husband as he is getting pie – with a kitchen apron fashioned out of XL dress shirts my son decided were not fashion-forward enough to make the trip to college with him. That statement makes me sound much craftier than I actually am. This project requires few supplies and even less sewing prowess.
You need a washable collared shirt, scissors, a needle and thread. You can pull this transformation off in 20 minutes if you pull out your sewing machine. But I use the hand-sewing skills I picked up at summer camp as a third-grader, making these aprons as I binge-watch period dramas. My production rate is one apron per two episodes of “The Crown.” Keeping my hands busy also cuts down on the imported wine I drink during these sessions, a sustainability bonus, indeed.
Google serves up dozens of blog posts and DIY videos on how to fashion an apron from a dress shirt. I picked and chose the elements from several to render a utilitarian apron. Some tutorials suggest turning a cut-off sleeve into a convenient front pocket, which I incorporated into my own process. While others add more frivolous touches like using trim from the back of the shirt to make a ruffle running across the apron’s bottom edge, which I didn’t.
To make one yourself, lay a shirt, button-side up, on a flat surface. It’s best to have the buttons done up at this juncture. Cut off each sleeve on a diagonal line from where the seams meet in the armpit to where the collar meets the double-layer yoke of the shirt. Carefully cut around the collar to separate it fully from the yoke. Don’t cut through the collar itself.
Now is the time to decide if you want a more masculine straight apron or fancy a more feminine, curvy one that wraps all the way around the backside. For the former, cut the shirt directly along the side seams, staying to the outside of each seam on each side. If you want the latter, leave about five inches of material on the outside of each seam. Then trim each side to be the same height as the bottom of the arm hole.
In either case, you need an 8-inch piece of the material from the back of the shirt to make apron ties. Cut that piece in half the long way so you have two strips, each 4 inches wide and 2 feet long. Fold these trips in half inside out the long way and sew the edges closed. Turn the ties right-side out once they are sewn together.
On the right side of the apron, turn the raw edges of the material to create a hem under and sew it down. Repeat this process on the left side of the apron. Sew one end of each of the ties to one side of the apron.
Take one of the removed sleeves, and cut it just above the placket (the part of the sleeve with the tailored slit to accommodate the wearer’s hand going through). Cut it again at the placket’s seam so that it lies flat. Sew this onto the front of the apron, centered just below the fourth button from the top to create a pocket.
See, I told you it was easier than you thought it would be to produce a sustainable Valentine’s Day gift. But if you’re not convinced, there’s always the option of making pie.
CHRISTINE BURNS RUDALEVIGE is a food writer, recipe developer and tester and cooking teacher in Brunswick, and the author of “Green Plate Special,” a cookbook from Islandport based on these columns. She can be contacted at cburns1227@gmail.com.
Send questions/comments to the editors.


