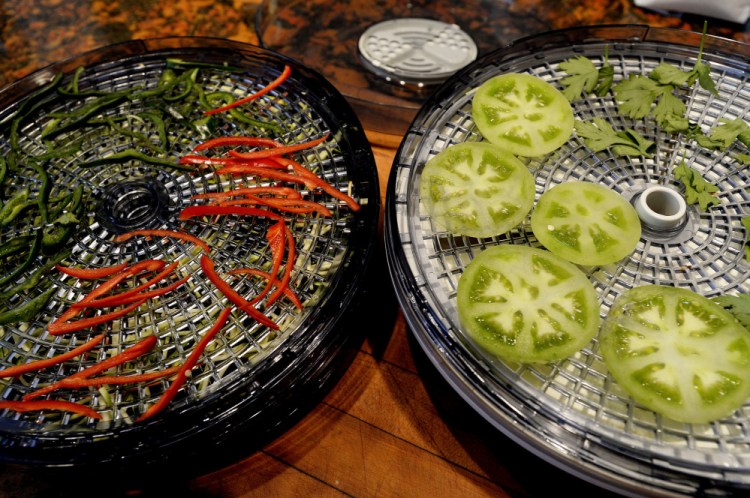
I’ve put more kids to bed than I have gardens. But I do know I need to harvest all the vegetables from the raised beds before cleaning up the soil and covering anything that needs to be tucked in for a long winter’s nap.
I’ve canned and frozen my way through more abundant crops this year (frozen tomatoes, canned hot peppers), but I’d be remiss if I didn’t give a nod to a third food preservation technique: dehydration.
I’m talking zesty zucchini chips, mouthwatering melon seeds, kale-idiscopic cherub dust and dried green tomatoes. Yes, my tongue is in my cheek, but only because it’s trying to pry out the honey-vanilla melon seed stuck between two back molars.
Drying food saves money, preserves the harvest and cuts down on storage space. But it takes time and consumes energy – solar, natural gas or electric. To pull enough water out of sliced tomatoes to be shelf stable, they must be dried for one to three days in the sun, eight to 12 hours in a dehydrator or 18 hours in an oven.
According to a library of books on the subject and Kathy Shaw – who operates Valley View Farm in Auburn, is a Master Preserver by way of the University of Maine Cooperative Extension program and dehydrates the full gambit of Maine produce for personal use and for sale – drying fruits and vegetables in the sun is the greenest way to go.
The trade-offs to that long-practiced method are pests and toxic dusts settling on your food while it’s outside drying. Food safety parameters dictate you pasteurize sun-dried fruits and vegetables (either in a 175 degree F oven for 15 minutes or in the freezer for 48 hours) to kill off any insect eggs that may have been laid among your dried goods.
Oven-drying requires a low temperature setting – between 125 and 145 degrees F, depending on the produce. Temperatures higher than that cause “case hardening,” a term for premature hardening of the exterior that prevents the interior from drying properly.
For those reasons, Shaw uses a commercial dehydrator to handle the volume she dries. To experiment, I borrowed a friend’s Maxi-Matic Elite five-tray model that pulls 120 volts/250 watts, costs around $50 and was designed for home use.
Dried green tomatoes appealed to me because of the play on words; also, I thought I could use them to add acidic flavor to wintery soups and stews. What I learned is that all things, even if they are of the same variety and cut in the same fashion, will dry differently.
This dehydrating experiment was not the set-and-forget prospect I’d anticipated. It involved a series of “dryness checks” conducted over an 18-hour period to ensure all of the slices were dry but not rock hard. To test for dryness, cool one slice of what’s being dried to room temperature. Consult a book, the Internet or the dehydrator’s operating instructions for how the specific fruit or vegetable should look and feel; the descriptors range from springy to leathery to brittle. If it fails the test, it goes back into the dehydrator. A serious dehydration devotee keeps copious notes about these things over time.
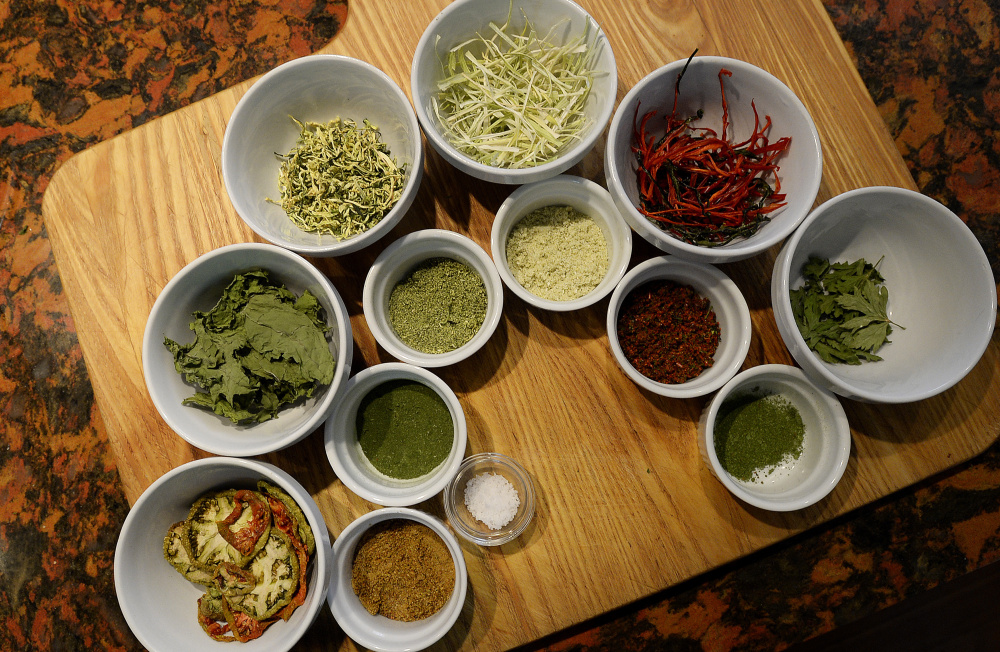
I wanted something more immediate from the kale, leeks, zucchini, peppers and tomatoes I had sitting on the counter. I ran with a vegetable bouillon of sorts (see recipe, page S2) because I could assemble julienned slices of vegetables I want to taste but not necessarily see in my winter soups on a different trays in the dehydrator until they passed the brittle dryness test, grind them to a powder in my coffee maker and combine them into a mix that will flavor my meals throughout the winter.
The bouillon is boundless. But I simply don’t do one-trick gadgets in the kitchen. No worries. Marrone writes that with a bit of shelf adjustment, the dehydrator can be used to help dough rise, make yogurt, re-crisp crackers and cookies, decrystallize honey, dry seeds and create croutons. I am sold on this dehydration thing.
Christine Burns Rudalevige is a food writer, a recipe developer and tester, and a cooking teacher in Brunswick. Contact her at: cburn1227@gmail.com.
Send questions/comments to the editors.


