Ninety percent of the estimated 11.3 million pounds of pumpkin grown in the United States last year went directly into cans. That still leaves more than a million pounds of fresh pumpkin that could have been carved and then cooked (maybe), composted (more likely) or chucked (probably).
If you’re intrigued by the idea of eating your Halloween decor, take a few agricultural facts and pumpkin preparations into account. Don’t start with a pumpkin cultivated to be a jack-o’-lantern. Johnny’s Seed Catalog says such varieties – with names like Champion, Howden, Polar Bear and Rock Star – are bred for size, shape, color, long handles, mildew resistance and early maturation, but not for flavor.
Brunswick resident Jackie Sartoris has routinely tried to scrape some flesh out of her children’s pumpkins before they set to cutting out lopsided smiles and triangular eyes. She makes a bisque. “But the carving pumpkin really has almost no flavor and a watery texture. So the (process) is more for the principle than any accomplishment in taste or nutrition,” Sartoris said.
Gabrielle Gosselin of Six River Farm in Bowdoinham grows a few jack-o’-lanterns for fun and distributes them among her crew. She sells only sweeter pie pumpkins, specifically Baby Pams.
Pie pumpkins are smaller (4 to 10 pounds) than carving ones (10 to 40 pounds). “But pie pumpkins are meatier,” Gosselin said, so frugal carvers can harvest the pulp before the pumpkin faces the decorative knife.
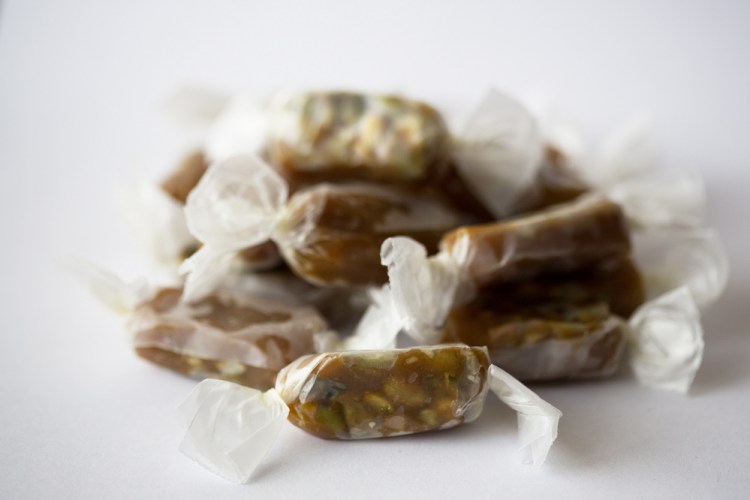
Taking Sartoris’ lead, I tested this process. I cut the top off a 4-pound pumpkin I bought from Gosselin, making sure the hole was big enough to fit my hand. I removed the guts and seeds, as I normally do to either roast them whole or hull them to get at the inner seeds called the pepitas, whose sage green color makes them lovely in pumpkin desserts, like the recipe I developed for Salted Pumpkin Caramels (at right).
I used an ice cream scoop with a formidable edge to scrape the pulp to within a ½ inch of the rind, placed the pulp in a steaming basket over boiling water, cooked it until tender and sent it through a food mill. The process of scraping took about 20 minutes and yielded 1½ cups of sweet pumpkin flesh. And while my pint-size jack-o’-lantern is not likely to keep the ghouls away, it makes me smile for a number of other reasons.
SALTED PUMPKIN CARAMELS
These caramels use both the pumpkin puree and the hulled seeds culled from your locally sourced Halloween jack-o’-lantern; be sure to buy a smaller (but sweeter) pie pumpkin, not the usual jack-o’-lantern varieties. You’ll need a candy thermometer.
Editor’s note: Christine doesn’t like to brag, so we will. This recipe was a winner in the website Food52’s best Halloween candy contest in 2010.
Makes 64 (1-inch) caramels
2/3 cup unsalted pepitas (hulled pumpkin seeds)
1 ½ cups heavy cream
2/3 cup pumpkin puree
1 ½ teaspoons pumpkin pie spice
2 cups granulated sugar
1/2 cup dark maple syrup
1/2 cup light corn syrup
4 tablespoons unsalted butter, cut in chunks
1 teaspoon lemon juice
¾ teaspoon Maine sea salt
Dry toast the pepitas in a skillet over medium heat until they start to pop. Remove pan from the heat. Line the bottom and sides of an 8-inch square pan with parchment. Butter the parchment on the sides of the pan. Spread the toasted pepitas evenly in the prepared pan.
Combine the cream, pumpkin puree and pumpkin pie spice in a small saucepan and warm over very low heat. Set aside.
In a heavy-bottomed pan, at least 4 inches deep, combine the sugar, both syrups and 1/4 cup of water. Place the pan over medium high heat. Stir mixture until the sugar is melted. Dip a heat-safe pastry brush in warm water to brush any sugar granules off the sides of the pan to prevent them from crystallizing. Attach a candy thermometer to the side of the pan. Allow the mixture to boil until it reaches 244 degrees (the soft ball point on a candy thermometer). Then, very carefully, stir in the cream-and-pumpkin mixture.
Over medium heat, bring the combined mixture back to 240 degrees. This can take a while – as much as 30 minutes – but don’t leave the kitchen. Watch it carefully and stir the mixture more frequently once it reaches 230 degrees to keep it from burning at the bottom of the pan.
As soon as it reaches the 240, pull it off the heat and whisk in the butter and lemon juice until both are fully incorporated. Pour the mixture into the prepared pan. Let cool 30 minutes, then sprinkle with salt. Let the caramels fully set (at least 2 hours) before using a hot knife to cut them into 1-inch squares and wrapping them individually in parchment or waxed paper. The caramels will keep at room temperature for 7 to 10 days.
Christine Burns Rudalevige is a food writer, recipe developer and tester, and cooking teacher in Brunswick. She writes about feeding her family Maine seafood at www.familyfish.net. Contact her at cburns1227@gmail.com.
Send questions/comments to the editors.


